Full body red light therapy panels guide: compare 3 sizes, 10 vs 20 minute sessions, distance, wavelengths, irradiance, stands, and buying specs.
Editorial Review: This article was written for consumer education about full body red light therapy panels, panel sizes, coverage, wavelengths, irradiance, session timing, distance, mounting, eye protection, and home-use safety. It references public information from Cleveland Clinic, the American Academy of Dermatology, NIH/PMC, FDA, and FTC. It is not medical advice.
If you are comparing full body red light therapy panels, the most practical answer is this: choose a panel based on the amount of your body it covers from the distance you will actually use it—not simply by wattage, LED count, or the words “full body.” A narrow panel may be tall enough for your torso and legs but still require you to rotate. A wider multi-panel system can cover more of the body at once, but it also costs more and needs a stable stand or wall setup.
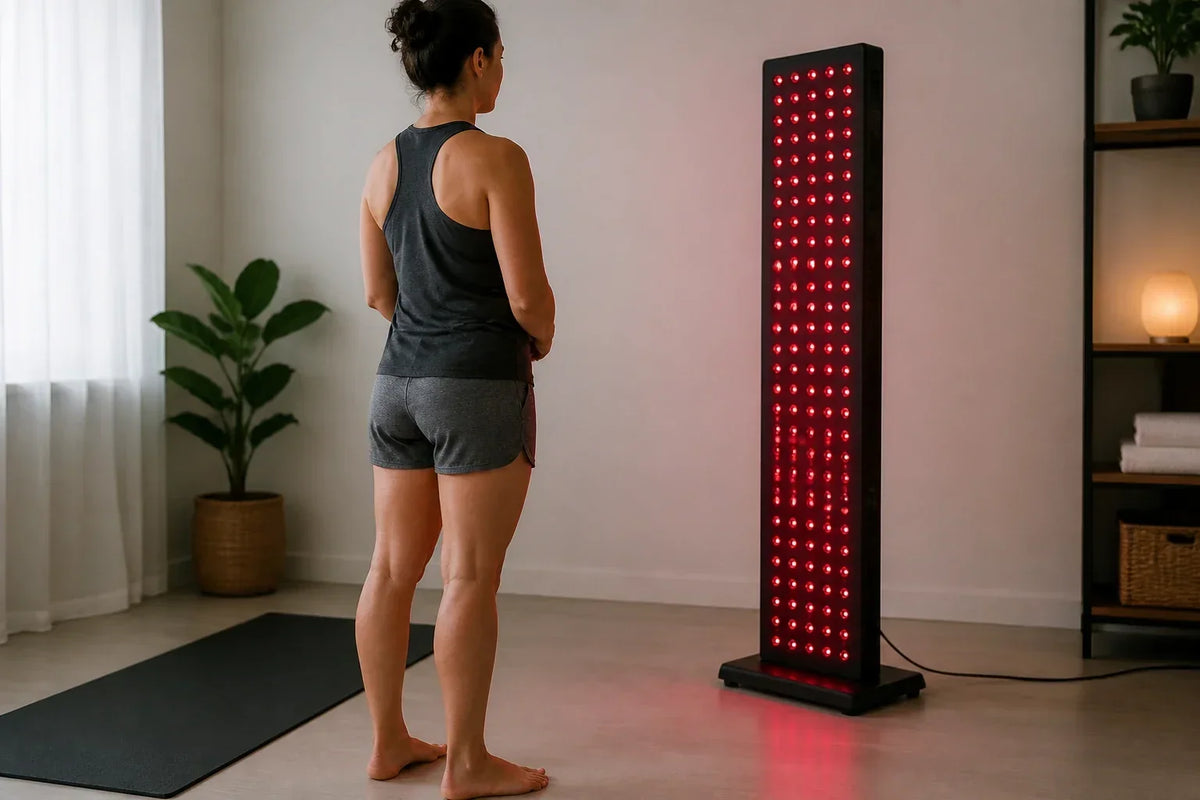
For many home users, the useful categories are a 24–36 inch half-body panel, a 40–65 inch tall body panel, or a wide multi-panel tower. Common home routines are around 10 to 20 minutes per side, although the correct distance and session time must come from the exact device manual.
My personal take is simple: a panel you can position correctly three or four times per week is more useful than the largest machine you can afford but cannot move, mount, or fit comfortably into your routine.

Quick Q&A: What Most People Want to Know First
| Question | Short Answer | My Practical Note |
|---|---|---|
| What size full body red light therapy panel do I need? | A tall single panel works for front-and-back sessions; a wider or multi-panel setup gives better shoulder-to-shoulder coverage. | I would measure the illuminated area, not just the metal housing. |
| Is 10 or 20 minutes better? | Either may be appropriate depending on output and distance. Longer is not automatically better. | Start with the device manual and avoid stacking extra sessions. |
| How far should I stand from a full body panel? | Many home devices use a range somewhere around 6–18 inches, but the correct distance is model-specific. | Moving closer changes exposure, so do not copy another brand’s routine. |
| Is one panel enough for full body use? | It can be, but you may need separate front, back, and side positions. | “Full body” often means tall coverage, not complete 360-degree exposure. |
| Should I choose 660nm and 850nm? | That is a common red-plus-near-infrared combination, but wavelength is only one buying factor. | I would also check coverage, output testing, timer, warranty, and stand stability. |
| Do I need eye protection? | Use goggles when the panel is near your face, includes NIR, feels intensely bright, or the manual recommends them. | I would never stare directly into the LEDs. |
| Can I use a full body panel through clothing? | Fabric reduces or blocks direct light from reaching the covered skin. | Expose the intended area while keeping the setup comfortable and private. |
What Counts as a Full Body Red Light Therapy Panel?
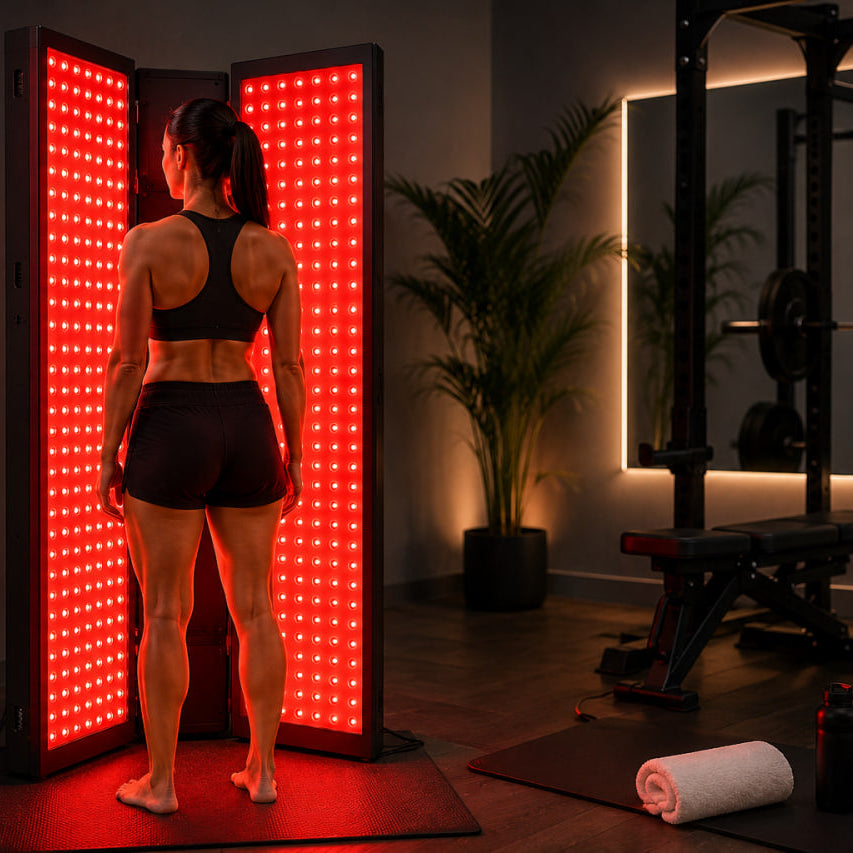
A full body red light therapy panel is usually a tall LED device designed to illuminate a large portion of the body from one position. It commonly uses visible red light, near-infrared light, or both.
The phrase full body is not a standardized size category. One company may use it for a 36-inch panel, while another reserves the term for a 65-inch tower or a multi-panel system. That is why product dimensions alone can be misleading.
Cleveland Clinic describes red light therapy as exposure to low levels of red light and notes that results vary by wavelength, device, and intended use. It also advises home users to follow directions and protect their eyes. You can review the overview here: Cleveland Clinic red light therapy overview.
Here’s the practical way I’d look at it: a panel qualifies as “full body” only when it covers the areas you care about without forcing you to complete six or seven separate positions.
3 Full Body Panel Sizes: Which One Fits Your Routine?
Panel size affects coverage, setup time, cost, weight, and how often you need to reposition. The approximate categories below are more useful than marketing labels because they describe how the equipment behaves in a real room.
| Panel Category | Approximate Height | Typical Coverage | Best Fit | Main Limitation |
|---|---|---|---|---|
| 1. Half-body panel | About 24–36 inches | Face and torso, or hips and legs | Small rooms, targeted routines, lower budgets | Requires more repositioning for full-body use |
| 2. Tall single panel | About 40–65 inches | Most of the front or back from one position | Home users who want a simple full-height setup | May be too narrow for shoulder-to-shoulder coverage |
| 3. Wide tower or multi-panel system | Often 60 inches or taller | Wider front, back, or side coverage | Shared homes, gyms, studios, frequent users | Higher cost, weight, power use, and space needs |
If you have a narrow single panel, turning your body is not a design failure. It is simply part of the routine. The real question is whether you are willing to complete those positions consistently.
Full Body Panel vs Bed vs Blanket
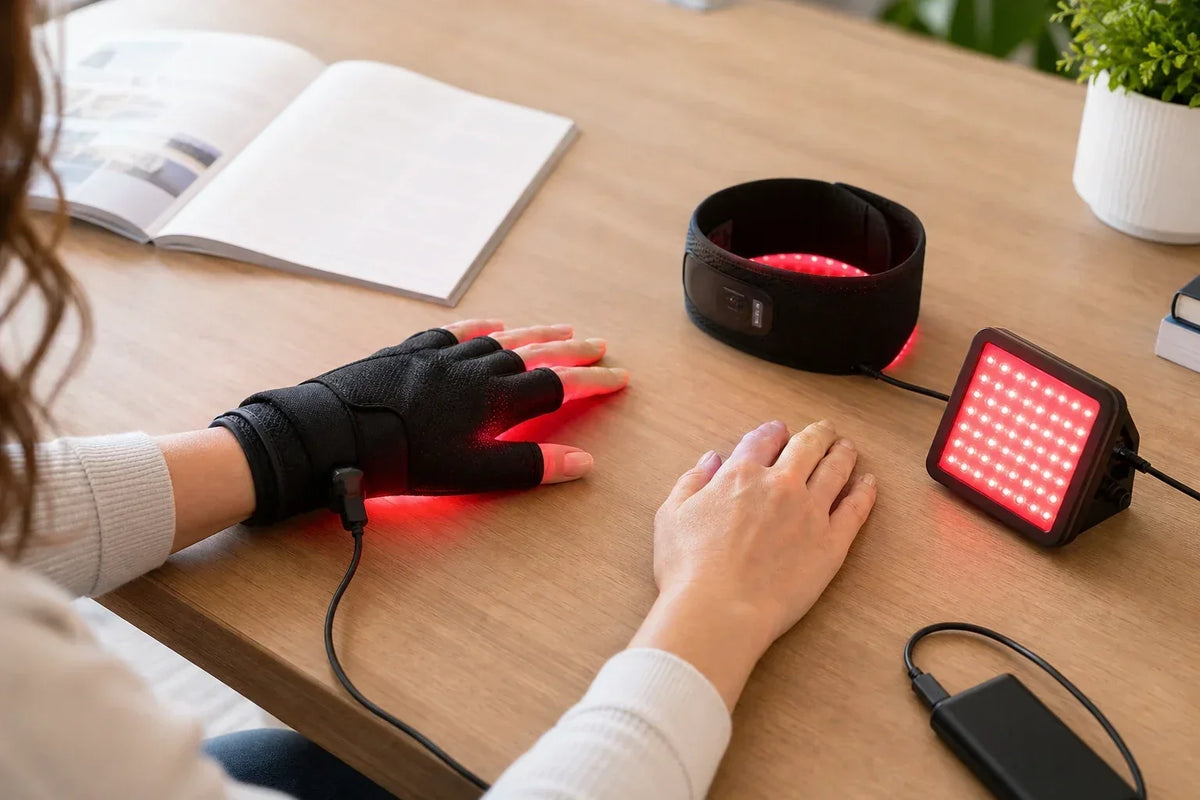
A panel is not the only full-body format. Red light beds and flexible LED blankets can also expose large areas, but they create very different user experiences.
Panels offer the best control over distance and angle. Beds offer simultaneous top-and-bottom exposure but take up substantial space. Blankets stay close to the body and are easier to store, but they provide less airflow and require more cleaning.
| Device Type | Coverage | Distance Control | Space Needed | Best For |
|---|---|---|---|---|
| Full body panel | One side at a time unless multiple panels are used | Easy to adjust | Moderate | Flexible face, body, standing, or seated routines |
| Red light bed | Front and back simultaneously | Mostly fixed | Very high | Commercial spaces or dedicated wellness rooms |
| LED blanket or sleeping bag | Close front-and-back coverage | Limited | Low when stored | Lying-down routines and limited floor space |
| Two-panel tower | Wide full-height coverage | Adjustable | High | Users who want fewer body rotations |
From an editor’s point of view, the panel is usually the most versatile format. It may not surround the entire body at once, but it gives you control over distance, angle, ventilation, clothing, and which area receives direct exposure.
660nm, 850nm, or a Multi-Wavelength Panel?
Many full body red light therapy panels combine visible red light around 630–660nm with near-infrared light around 810–850nm. Some newer panels add wavelengths such as 630nm, 810nm, 830nm, 850nm, or 940nm.
A current NIH/PMC consumer product guide emphasizes that buyers should evaluate wavelength together with irradiance, dose, coverage, testing method, and device instructions rather than treating one number as proof of quality. You can review it here: NIH/PMC red light therapy product guide.
This is where many home users get confused. A seven-wavelength panel is not automatically better than a dual-wavelength panel. More wavelengths may provide additional control, but only when the device explains how much output each mode receives.
| Wavelength Range | Common Label | Visibility | What Buyers Should Check |
|---|---|---|---|
| 630–660nm | Visible red light | Clearly visible | Whether the panel lists exact wavelengths and mode ratios |
| 810–850nm | Near-infrared light | Dim or invisible | Do not judge output from visible brightness alone |
| 660nm + 850nm | Dual wavelength | Visible red plus less-visible NIR | A common, straightforward home configuration |
| 5 or more wavelengths | Multi-wavelength panel | Mixed | Check whether each wavelength has meaningful LED allocation |
Irradiance: Why the Highest Number Is Not Always the Best Panel
Irradiance is commonly shown in milliwatts per square centimeter. It describes light power over an area, but the number is only useful when the brand also explains the measurement distance, meter, wavelength mode, and test conditions.
Two brands can publish very different irradiance values for similar panels because one tests at 3 inches and another tests at 12 inches. Some meters also respond differently to mixed red and near-infrared wavelengths.
I would not overthink the largest number on the specification chart. A high-output panel may shorten a session, but it can also reduce your margin for error if you stand too close or extend the timer unnecessarily.
| Specification | Useful Information | What It Cannot Tell You Alone |
|---|---|---|
| Irradiance | Approximate light power at a stated distance | The complete dose without session time |
| LED count | How many LED packages are installed | Output, uniformity, or chips per LED |
| Electrical wattage | Approximate system power demand | How much light reaches the body |
| Pulse mode | The panel can cycle its output | That pulsing is automatically superior |
| Beam angle | How widely each LED spreads light | Complete coverage without checking panel dimensions |
10 vs 20 Minutes: Session Time and Distance
The appropriate session length depends on panel output, distance, body position, wavelength mode, and whether you are exposing one side or both sides of the body.
Research on photobiomodulation often discusses a biphasic dose response, meaning more exposure is not always proportionally more useful. You can review the NIH/PMC dose-response paper here: NIH/PMC biphasic dose-response review.
The practical rule is simple: use the manufacturer’s recommended combination of distance and time. Do not borrow a 10-minute routine from a different panel with a different output.
| Session Length | Possible Use | Practical Note |
|---|---|---|
| 5 minutes | Initial comfort test with a new high-output panel | Useful for checking brightness, warmth, and eye comfort |
| 10 minutes | Common home session at the recommended distance | A reasonable starting point for many devices |
| 15 minutes | Moderate routine when the manual supports it | Do not reduce distance at the same time |
| 20 minutes | Lower-output or farther-distance setup | Not automatically better than 10 minutes |
| 30+ minutes | Device-specific use only | Often unnecessary for a consumer full-body panel |
If your panel is narrow, remember that “10 minutes” may mean 10 minutes for the front and another 10 minutes for the back. That is a 20-minute total routine even though each side receives only one cycle.
Vertical Stand, Horizontal Stand, or Wall Mount?
A large panel needs a stable support system. Leaning a tall, heavy device against furniture may feel convenient, but it creates inconsistent angles and a tipping risk.
A vertical stand works well for standing sessions and smaller rooms. A horizontal stand lets you lie below the panel but requires more floor space. A wall mount saves space but limits repositioning. A rolling stand offers the most flexibility but needs locking wheels and a stable base.
| Mounting Option | Best For | Main Advantage | Main Limitation |
|---|---|---|---|
| Vertical floor stand | Standing or seated sessions | Simple footprint and height alignment | May not angle over a bed |
| Horizontal stand | Lying-down full-body routines | Relaxed position and consistent distance | Needs substantial floor space |
| Wall mount | Permanent home wellness area | Stable and space-efficient | Limited mobility and height adjustment |
| Rolling stand | Shared rooms and multiple body positions | Easy repositioning | Quality and wheel stability vary |
| Door mount | Lighter single panels | Low floor-space requirement | Not suitable for every panel weight or door |
12 Buying Checks for Full Body Red Light Therapy Panels
The strongest buying page should provide enough information to estimate how the panel will work in your room. A large wattage number and a photograph of a glowing model are not enough.
| Buying Check | What to Look For | Red Flag |
|---|---|---|
| 1. Illuminated dimensions | Actual LED coverage height and width | Only total housing size is listed |
| 2. Wavelengths | Exact red and NIR wavelength numbers | Only says “full spectrum red light” |
| 3. Mode control | Ability to control red, NIR, intensity, or pulse settings | No explanation of what each mode changes |
| 4. Irradiance context | Measurement distance and test method | One large number with no conditions |
| 5. Beam angle | Enough spread for even coverage at your distance | Highly focused light with narrow body coverage |
| 6. Flicker | Clear statement or testing information | No specifications despite strong brightness |
| 7. Cooling | Reliable fans and safe ventilation | Blocked vents or excessive housing heat |
| 8. Stand compatibility | A stable stand designed for the panel’s weight | Generic stand with unclear load rating |
| 9. Eye protection | Goggles and clear face-use instructions | Claims that bright light never requires caution |
| 10. Electrical safety | Appropriate certifications and voltage information | Missing power specifications |
| 11. Warranty | Coverage for LEDs, controller, fans, and power supply | Very short warranty for an expensive panel |
| 12. Return policy | Enough time to test size, brightness, noise, and placement | High restocking fees or unclear return shipping |
How to Set Up a Full Body Panel at Home
- Choose a dry, ventilated area with enough clearance around the panel fans.
- Install the approved stand or mounting hardware before powering the panel.
- Measure the recommended distance rather than estimating it by eye.
- Expose the intended body area and remove thick clothing from that area.
- Put on goggles when using the panel near the face or when the manual recommends them.
- Select the intended red, NIR, intensity, or pulse mode.
- Begin with the shorter end of the recommended timing range.
- Complete the front, back, or side positions needed for your panel width.
- Stop if you experience eye strain, excessive warmth, irritation, or unusual discomfort.
- Allow the panel to cool and keep its vents free of dust.
Safety Notes for Large Red Light Panels
Cleveland Clinic notes that misuse, excessive frequency, or unprotected eye exposure may create risks, even though short-term use as directed is generally considered low-risk. The American Academy of Dermatology also advises following product instructions and using eye protection when recommended.
You can review the AAD guidance here: American Academy of Dermatology red light therapy safety guidance.
- Do not stare directly into red or near-infrared LEDs.
- Ask a healthcare professional about known light sensitivity or photosensitizing medication.
- Do not place a heavy panel on an unstable shelf or improvised stand.
- Keep ventilation openings clear.
- Do not use a damaged power cable, controller, plug, or fan.
- Do not assume invisible NIR output is weak because you cannot see it.
- Use a timer instead of estimating session length.
Common Buying and Setup Mistakes
| Mistake | Why It Happens | Better Move |
|---|---|---|
| Buying by wattage alone | Large electrical numbers look powerful | Compare measured output, coverage, and distance |
| Assuming tall means wide | The product is labeled full body | Check shoulder-to-shoulder illuminated width |
| Standing closer than directed | Users want a stronger session | Use the manufacturer’s distance |
| Doing two long cycles per side | More exposure feels more valuable | Start with one controlled cycle |
| Using an unstable stand | The stand appears less important than the panel | Check weight rating and locking hardware |
| Ignoring fan noise | Noise is rarely shown in product photos | Check reviews and return terms before buying |
| Buying more wavelengths without checking allocation | More numbers look more advanced | Ask how many LEDs are assigned to each wavelength |
My Practical View
My personal take is simple: the best full body red light therapy panel is not necessarily the tallest or most powerful model. It is the panel that gives useful coverage at a clearly documented distance and fits a routine you can repeat safely.
If I were helping a friend choose between three sizes, I would start with the room. A half-body panel can be enough when storage is limited and the user does not mind repositioning. A tall single panel is the practical middle choice. A multi-panel tower makes sense when several people will use it or when reducing session positions is worth the additional cost.
What often gets missed in buying guides is the stand. Once a panel becomes tall and heavy, the support system is part of the product. An excellent panel on an unstable base is not an excellent home setup.
I would not overthink one irradiance number from one testing distance. The part I would pay attention to is whether the brand explains its test method, recommended distance, session duration, illuminated dimensions, wavelength distribution, eye guidance, and warranty.
For most homes, a tall single panel with reliable mounting, red-plus-NIR control, a timer, and enough width to cover the torso is the most balanced starting point. A wider system becomes worthwhile when full-body convenience matters more than portability or price.
References
- Cleveland Clinic: Red Light Therapy Overview
- American Academy of Dermatology: Red Light Therapy Safety
- NIH/PMC: What to Look for in Red Light Therapy Products
- NIH/PMC: Large-Area and Full-Body Red and Near-Infrared Light Trial
- NIH/PMC: Biphasic Dose Response in Low Level Light Therapy
- NIH/PMC: Photobiomodulation—Lasers vs LEDs
- FDA: General Wellness Policy for Low-Risk Devices
- FTC: Health Products Compliance Guidance
FAQ
What size full body red light therapy panel should I buy?
A 24–36 inch panel suits targeted or half-body routines. A 40–65 inch panel can cover most of the front or back. A wider multi-panel system provides better shoulder-to-shoulder coverage with fewer positions.
Is one red light therapy panel enough for the full body?
One tall panel can be enough if you are comfortable completing separate front, back, and side positions. A wider or multi-panel setup reduces repositioning but requires more space and budget.
How long should a full body red light therapy session last?
Many consumer routines are around 10 to 20 minutes per side, but session time depends on the panel’s measured output, distance, wavelengths, and instructions. Longer exposure is not automatically better.
How far should I stand from a full body red light therapy panel?
Many consumer panels recommend a distance somewhere around 6–18 inches, but there is no universal distance. Follow the manual for the exact model because exposure changes as you move closer or farther away.
Is 660nm and 850nm good for a full body panel?
660nm visible red light and 850nm near-infrared light are a common dual-wavelength combination. Buyers should also evaluate coverage, measured output, timing, controls, and wavelength allocation.
Do full body red light therapy panels work through clothing?
Clothing reduces or blocks direct light from reaching covered skin. For direct exposure, uncover the intended area while following privacy, comfort, and device safety instructions.
Do I need goggles with a full body red light panel?
Use goggles when the panel is close to your face, includes near-infrared light, feels intensely bright, or the manufacturer recommends eye protection. Avoid staring directly at the LEDs.
Is a full body red light panel better than a blanket?
A panel provides better distance, airflow, angle, and targeting control. A blanket provides close front-and-back coverage while lying down and is easier to store. The better format depends on space and routine preferences.